Headlight bulb issue

Hypermotard Forum

Help Support Hypermotard Forum:

This site may earn a commission from merchant affiliate links, including eBay, Amazon, and others.

Jim939UK

Active Member
Joined
Apr 29, 2019
Messages
38
Location
Sheffield
Hi guys, hoping someone can help.

I bought my 2016 last year and so far, had no issues. Noticed a week or so ago that the main headlight beam wasn't working. Running lights and high beam are ok. Did a search on here and saw the main beam can go due to usage and found a link that someone shared for getting to the bulb which worked fine.
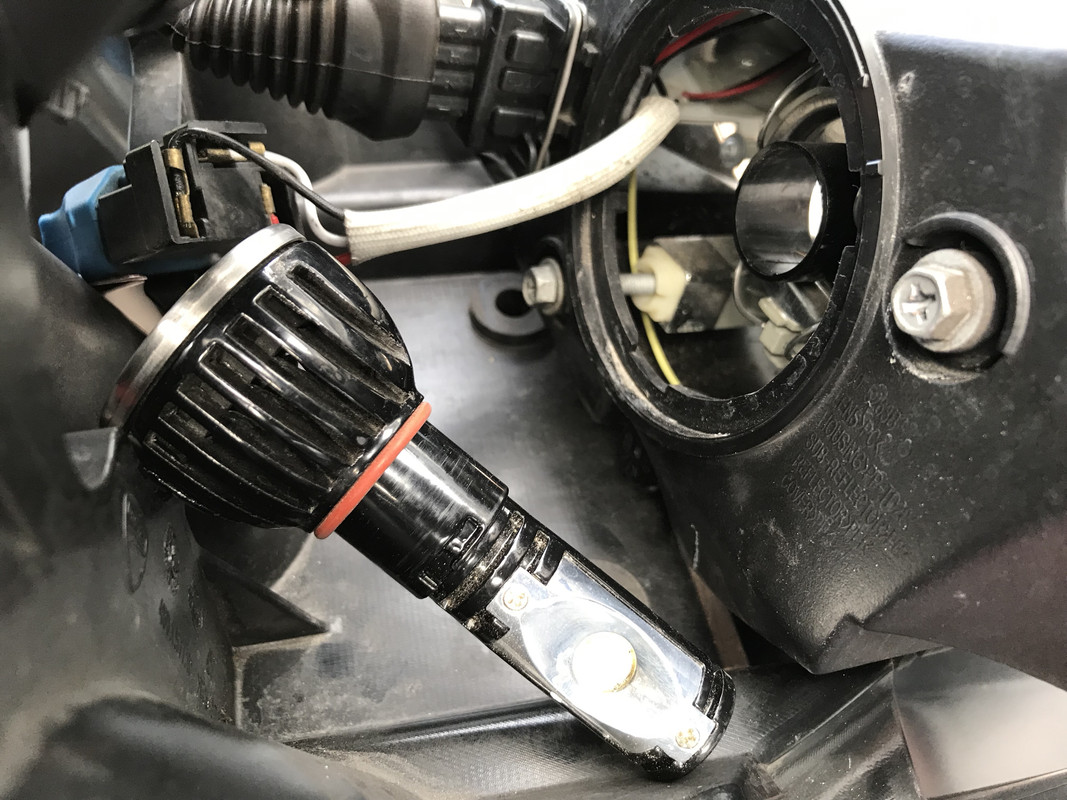
However, it turns out that unbeknown to me, the previous owner has switched the bulb for an LED set up. I wasn't made aware of this by the Ducati dealer.


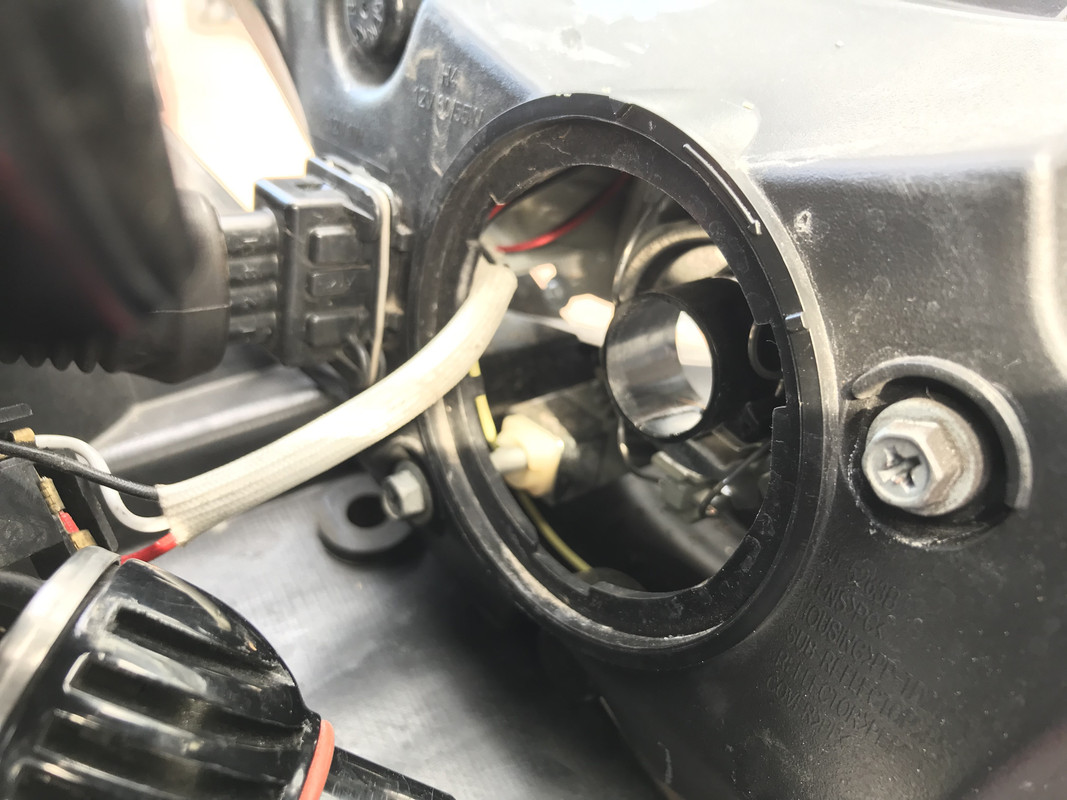
Here are some pics when I got the headlight off...
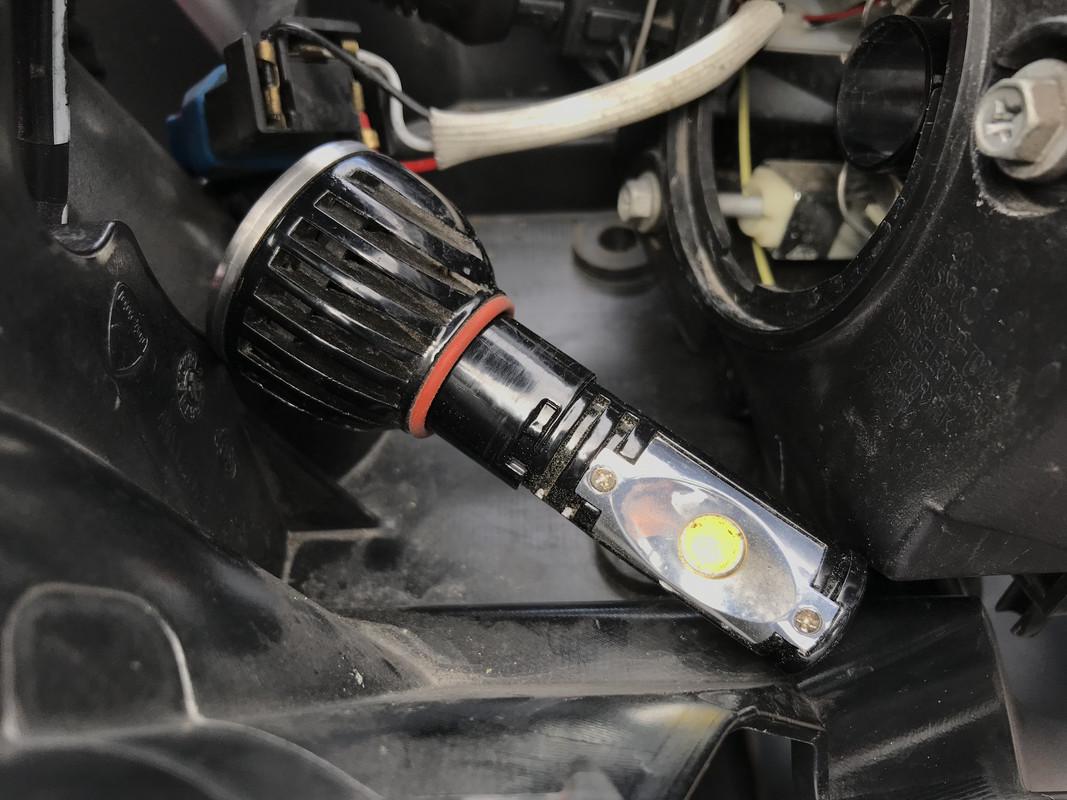


So I'm a it stuck now as not very electrical savvy - the bulb has a round screw in connector which is like 5 small pins. Most replacement LED bulbs tend to be a 3 pin style connector.

Any advise/suggestions welcome.
 
Led bulbs have 2 parts - the bulb and base -which I see - and the driver. The driver is a black box. The driver cable runs from the bulb to the standard 3 prong plug and plugs into that plug.

The pics look like this is a messy install, but I'm thinking you should be able to unplug the connector I see, revealing the original connector, and follow the white cable back to find the black box tucked into the shell.
 
Actually scotch that reply. I can't really tell what's going on - did you remove the driver? Is that 3 prong female plugged into another connector? I can't tell from the pics, but if there is a cable attached to the bulb, where does it terminate.

Sorry not being helpful - usually these installs are plug and play, but I can't quite parse the pics.

Hi, thanks for your replies. I'll grab a picture of the connector later.
 
The other problem being is that you have seemed to have taken out the LED bulb itself but left the spacer in the Duc housing.

Most LED bulbs (or good ones) will have the plastic spacer to add in installation. Whichever route you take (either replacing with another LED or go back to halogen) you'll have to remove the black circular spacer in the housing
 
Could just be a cheapo. Looks like they tried making the driver and bulb housing a single unit. Can't say if that's a bad idea, but all the higher end LED replacements I've seen had a remote driver that you had to mount or stow.
 
netaron, those look pretty much plug and play? Just what I'm looking for.
Thanks for the great find.
 
It's plug and play like you say, nothing to look for except making sure it's inserted right side up, otherwise your high and low-beams will be reversed, but very easy fix.
 
Last edited:
Just a quick follow up. The install was indeed plug and play. It's a major improvement over stock, but that's all I have to compare it to. Really like the color.
I had to figure out the screws to pull to get to it, but really not bad. I ended up with the headlight assembly on the bench which made it a piece of cake.
 
That's great! Glad it worked out and also awesome that you reported back. One thing I forgot to mention is some people had to adjust the headlight throw, I did have to raise the low beam slightly to match the stock throw, but ymmv.
 
Netaron, since mentioning the throw, I did take it out last night far a run. Until full darkness, I couldn't see a difference when I switched to high beam. I know it's not upside down, and for sure is brighter when I stand in front. After dark,in the woods, I see that the beam is hitting the bottom of the trees! Did not expect that.
Got home and could not get it adjusted down. Check some threads here and there was mention of shimming the top,but that would bring the light higher I believe.
I removed the bulb to make sure the bulb was sitting ok, but the 2 lock studs had broken off. Maybe from the pressure of the dust cover. So, lets try the other, since they are a set, and bulb 2 does not come on. Other bulb still works, stock one still works, but this one is dead.
Insert old stock bulb, re-align to spec, and send the whole lot back for a refund. Glad you like them, the color and intensity were very good, just did not agree with me.
I run Flux Beam in my car with great results. I found that they do sell a replacement H4 for motorcycles so I'm ordering one this week. Way more $ but if anything like my others, it's worth it.
I'll be happy to report my results next weekend.
Side note: Flux lights for my car came with a capacitor that I did not need, so I now have a " Flux Capacitor" hanging over my workbench.
 
OP's bulb design vs the other replacement led

Hi A total amateur observation.

The original posters bulb seems more like a home open light fixture bulb given that the heat fins are right on the bulbs back! That would trap heat in the housing of the bike head light, where as the replacements posted had the heat fins on the outside of the housing, which make better common sense, to better cool the bulb and keep it alive longer instead of letting the heat accumulate and kill the bulb and perhaps endanger the housing as well. Just my 2 cents and probably worth even less!
 
How's the pattern / cut off? I've heard in some cases you have to shift the bulb back a bit to get the proper throw from the headlight reflector? Also, does all this fit inside the housing with the cap on?
 
Yes, it's a bit snug, but fits fine.
 

Attachments

  • IMG_2117.jpg
    IMG_2117.jpg
    89.6 KB
  • IMG_2119.jpg
    IMG_2119.jpg
    91.4 KB
This is the unit I ended up with. I've used these on my car for the last couple of years with no issues. Always on for 2-3 hrs a day.
Well built anodized aluminum with a built in cooling fan. Directions say to cut a hole in the dust cover, but there is plenty of room for the fan to move air, and big enough capsule. I didn't put holes in my cars either.
Super easy install, minor adjustment up for me.
Brighter and cleaner beam. White with VERY slight blue tint. I only have my eyes to judge by,but I think it's worth it.
Little pricey at $64 + tax EACH. You can order from OPT7 through Amazon here: https://www.amazon.com/gp/product/B071K15VNB/ref=ppx_yo_dt_b_asin_title_o05_s00?ie=UTF8&psc=1
 

Attachments

  • Flux Box.jpg
    Flux Box.jpg
    9.3 KB
  • In The Box.jpg
    In The Box.jpg
    18.1 KB
  • Bulb Assy.jpg
    Bulb Assy.jpg
    16.3 KB
  • Without Ring.jpg
    Without Ring.jpg
    16.7 KB
  • Good Fit 1.jpg
    Good Fit 1.jpg
    14.1 KB
  • Good Fit 2.jpg
    Good Fit 2.jpg
    18.8 KB
As an Amazon Associate we earn from qualifying purchases.
Yes, it's a bit snug, but fits fine.
Sorry for reviving an year old thread but did your high-beam indicator on the dashboard keep blinking when the high beam is on? I've tried the Philips Ultinon H4 and my dashboard thinks the high beam is out.
 
No, mine had no issues. My guess is it may have to do with the amount of resistance the load introduces, or lack of. I've only tried the one I mentioned on the previous page and that worked great.
 
That sounds like incompatibility with the canbus (or whatever) electrical system. I fitted a four-COB LED bulb which claimed compatibilty and it works fine, though the beam pattern is not great due to the rather fat array of emitters. I've since tried a much better LED (brighter and better beam on other bikes) and added a canbus-compatibility widget and it didn't work properly at all, so reverted to the four-COB unit. Maybe I should try another brand of widget, but I don't ride at night and a diffuse beam is very noticeable in daylight conditions, which is what I'm looking for!
 
Back
Top