- Joined
- Jul 24, 2014
- Messages
- 1,323
- Location
- California
Ducati Hypermotard and Hyperstrada 821 2013 2014 2015 Starter Motor Replacement DIY
Why?
If your starter motor sucks. This is identifiable by slow cranking with several clicks and requires 3-4 presses of the starter button, especially with the engine warm or hot. Also accompanied by a flickering dash.
Tools Required:
Misc. sockets (7mm, 8mm, 10mm)
Misc. allen keys (3mm, 4mm, 5mm, 6mm)
Torque wrench 0-20 in-lbs
Loctite 243 (primerless, medium strength)
Permatex Ultra Black gasket maker silicone (maximum oil resistance)
Grease for shift shaft seal
Dielectric or conductive grease for motor terminal
Don't forget to bring a towel! (Lots of them)
Razor blade or sharp plastic scraper
Ducati generator cover puller tool (directions below)
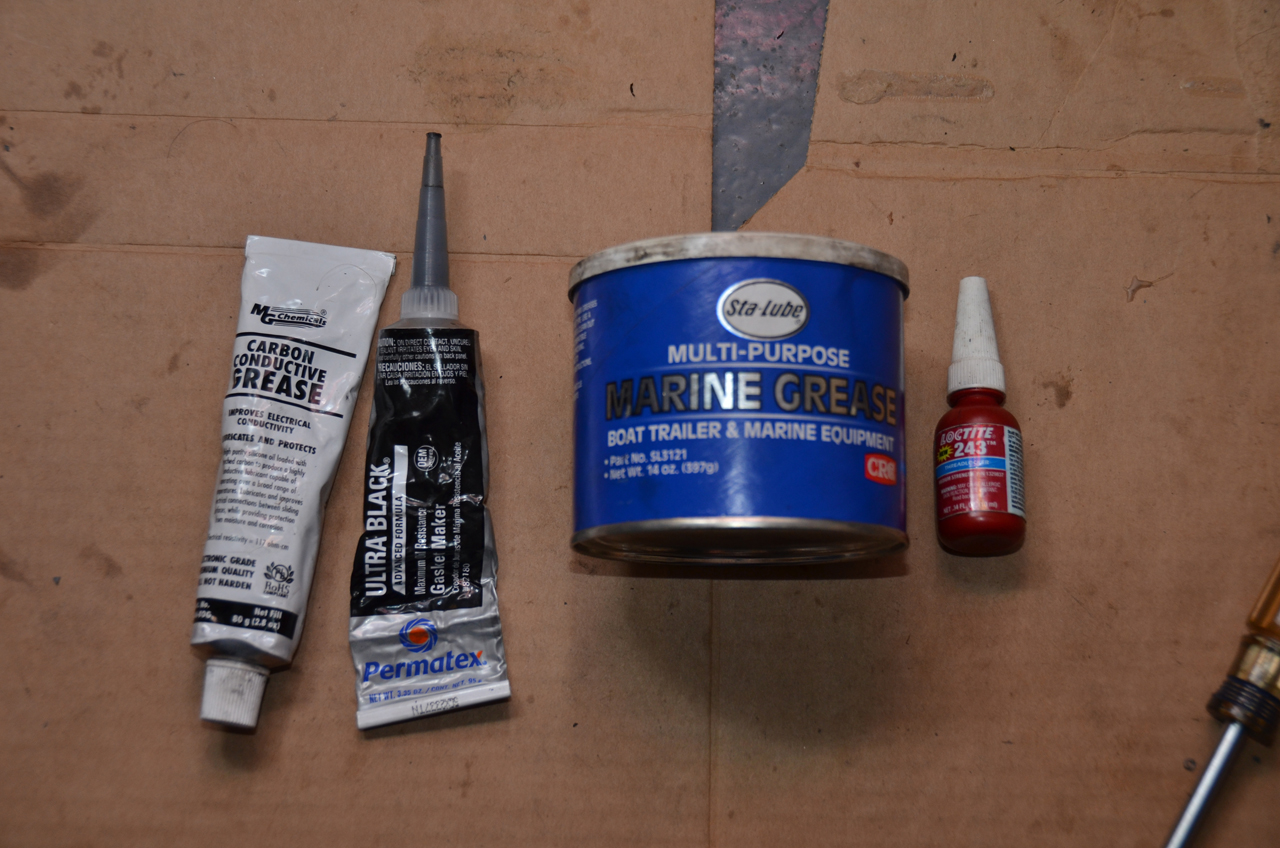
Parts required:
Starter motor 27040104A
Starter motor gasket 78845102A
Engine oil if you aren't reusing (commence oil discussion)
Coolant if you aren't reusing (AGIP Coolant Permanent Special)
0. Put on some good tunes and put the bike on a stand. You're gonna be here for a while. It took me a good 6 hours, most of which was cleaning the old gasket material.
1. Drain the engine oil.
2. Remove the right side fairing pieces.
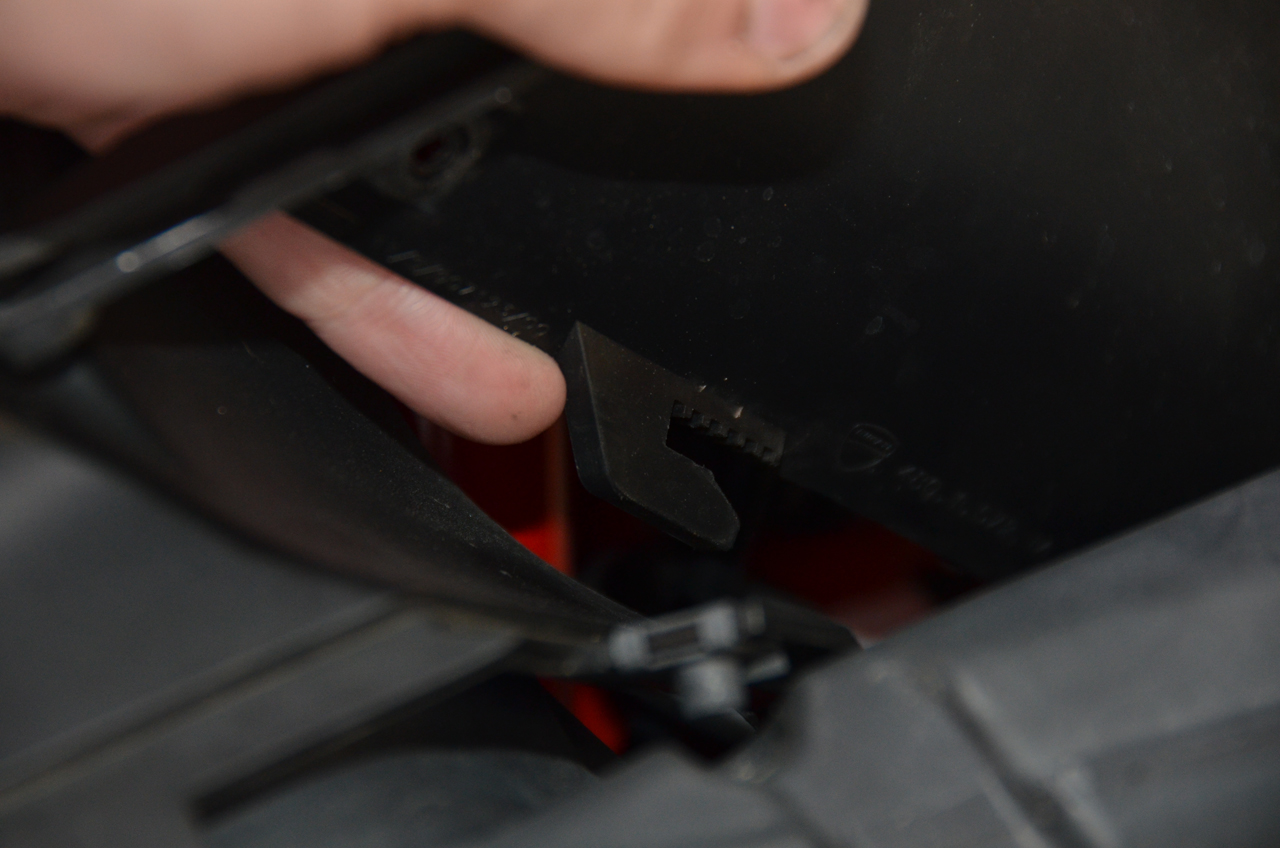
Remove the three screws and lift this piece straight upwards to remove it from the slot.
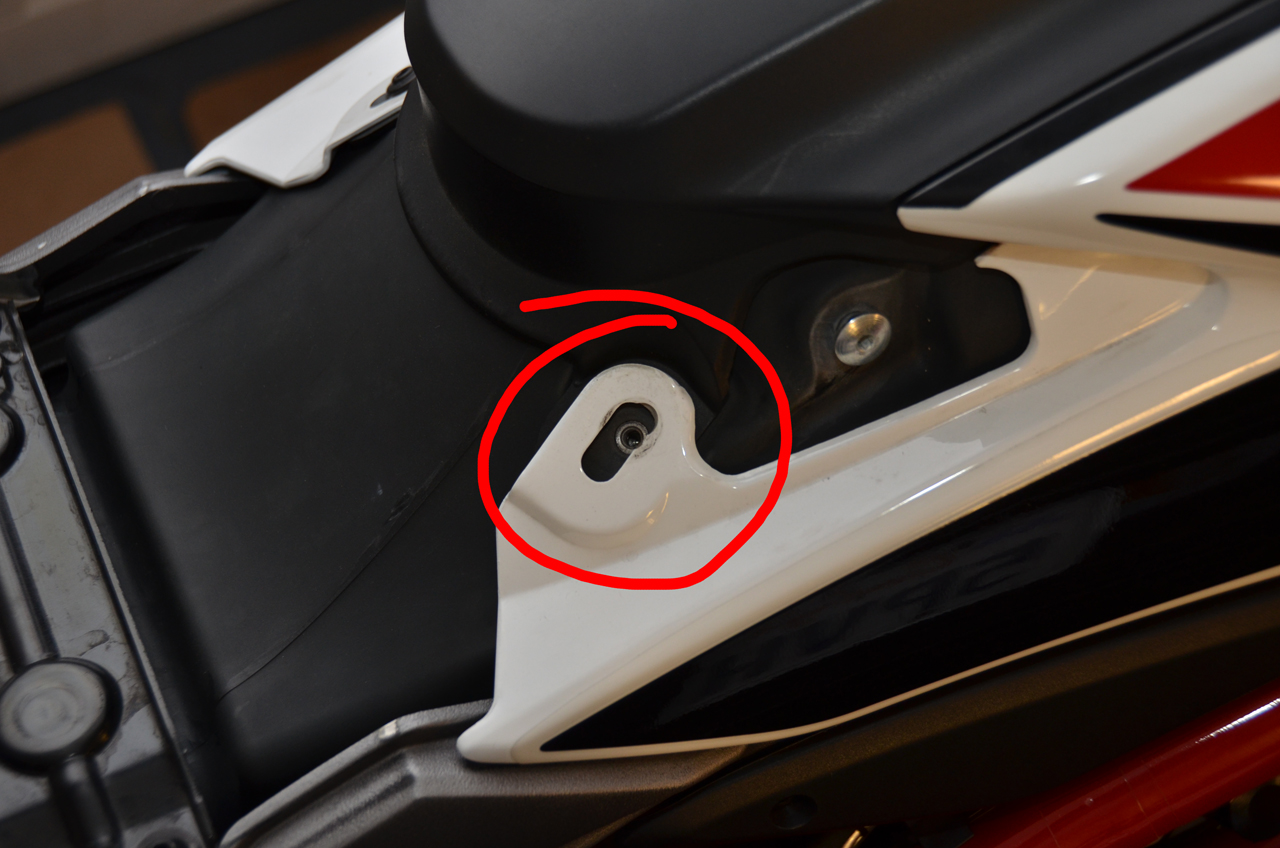
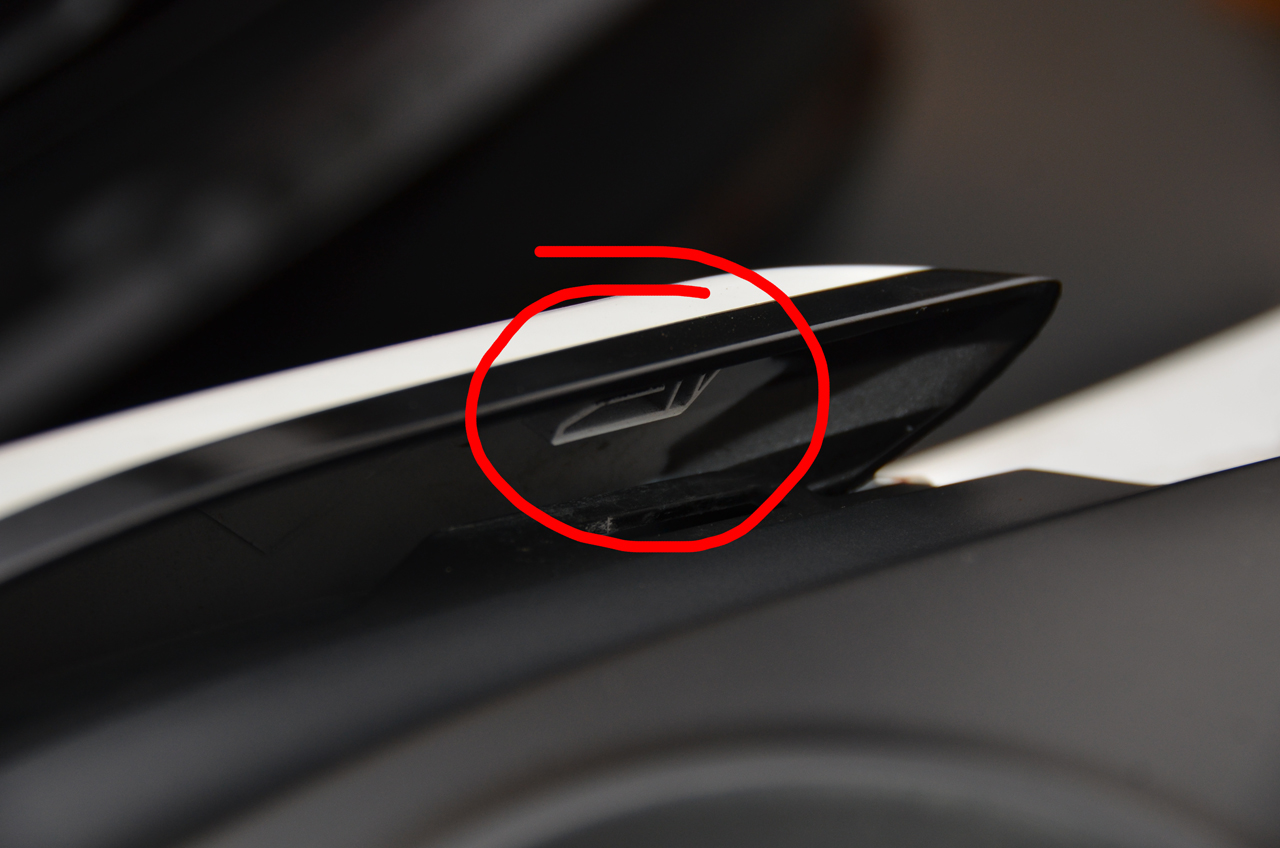
Remove the two screws in the fairing and slide it towards the rear of the bike to remove it from the slots.
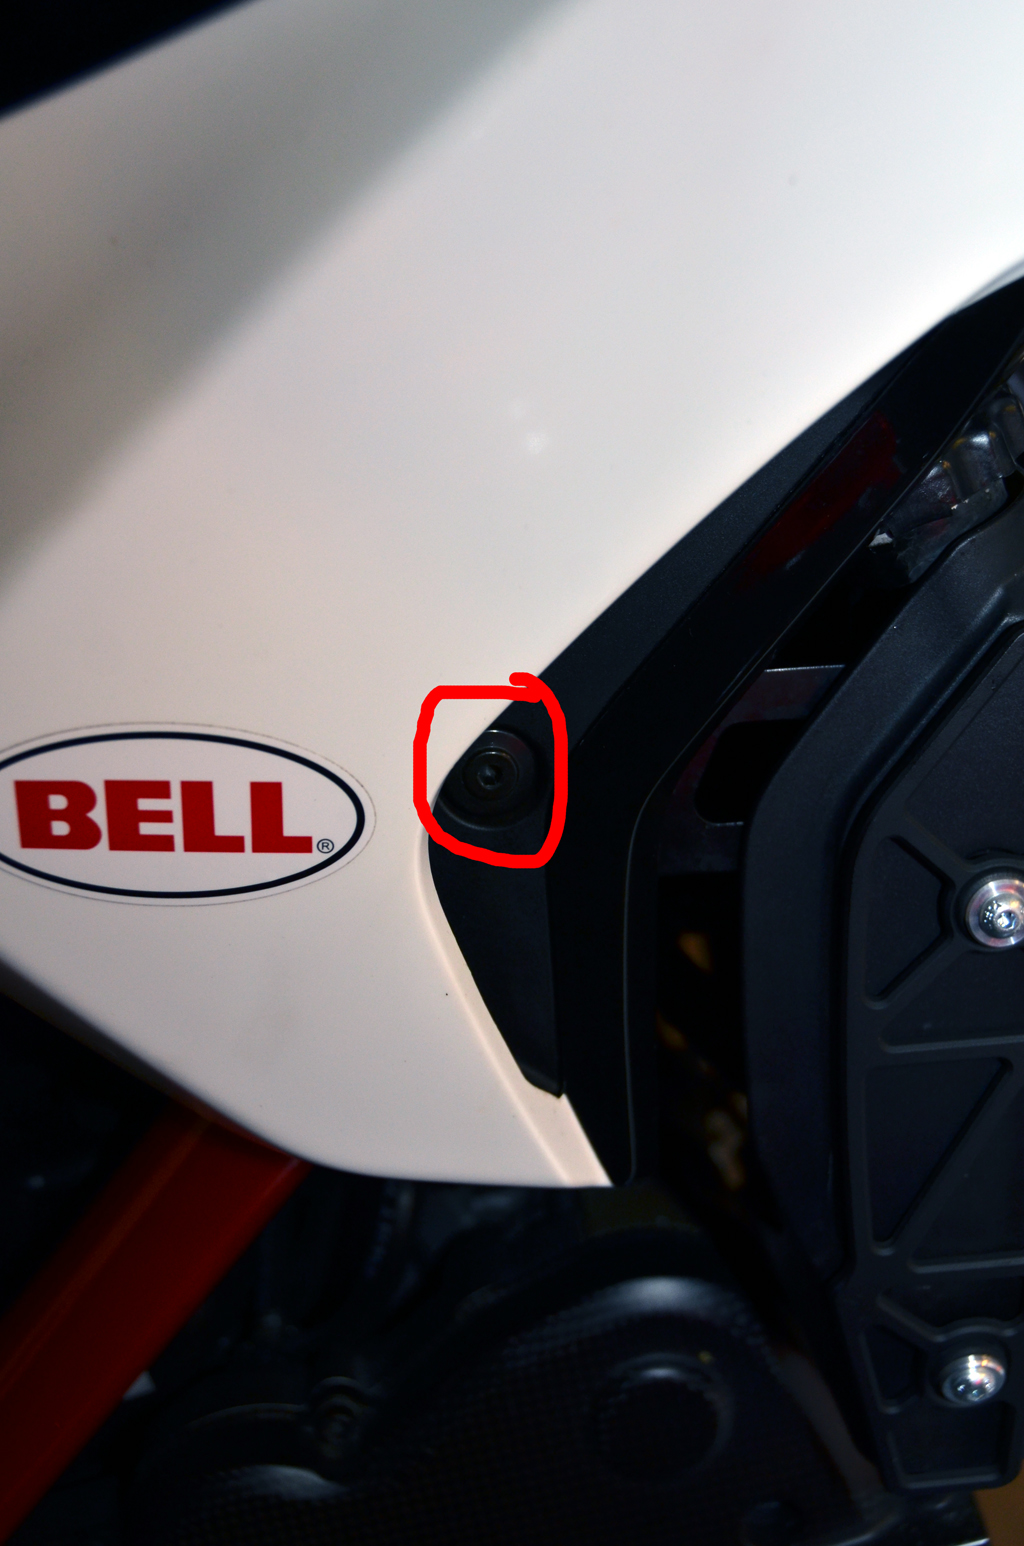
2. Remove the radiator cap. Drain the coolant into a clean container (old water or milk jug).The bike holds 2.3L.
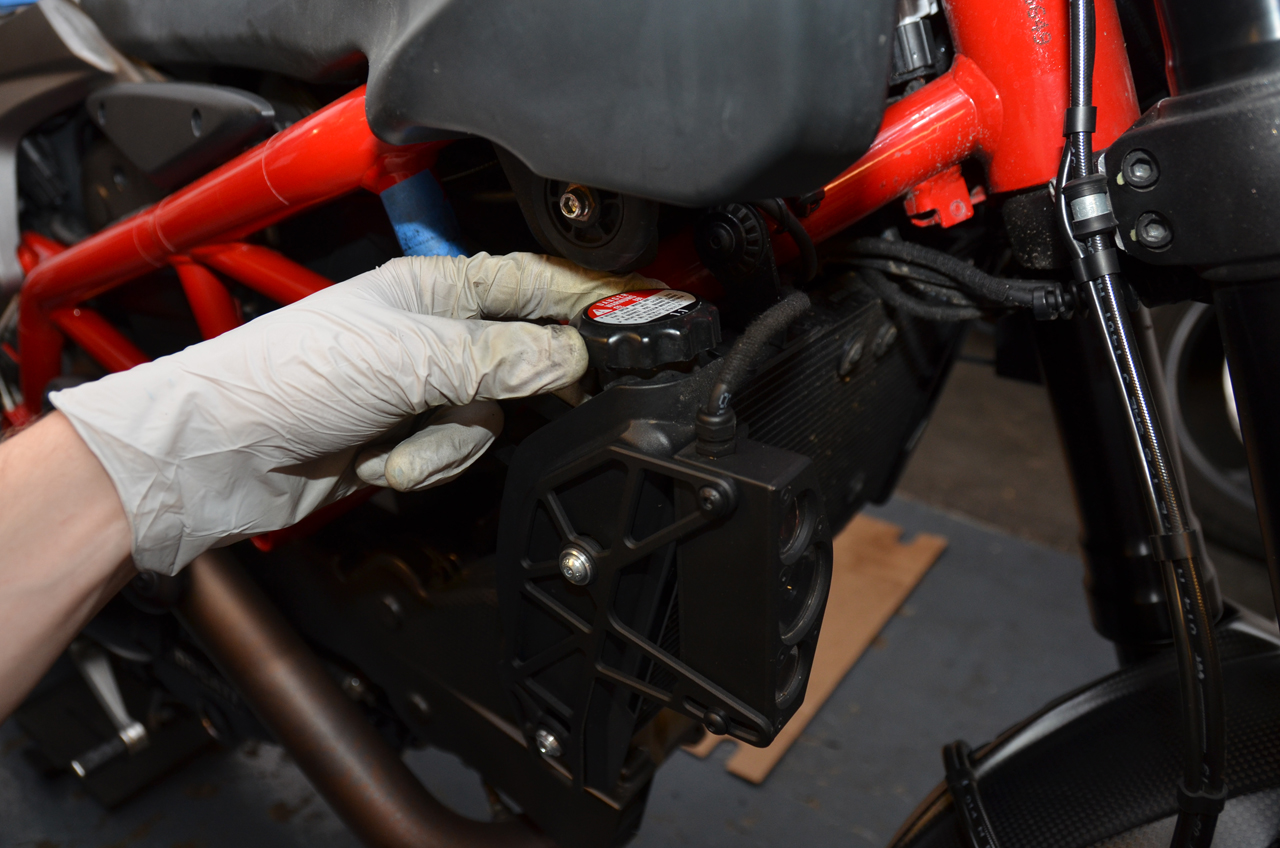
Removing the radiator cap lets coolant flow out more easily. The coolant will squirt out, so make sure you are ready!
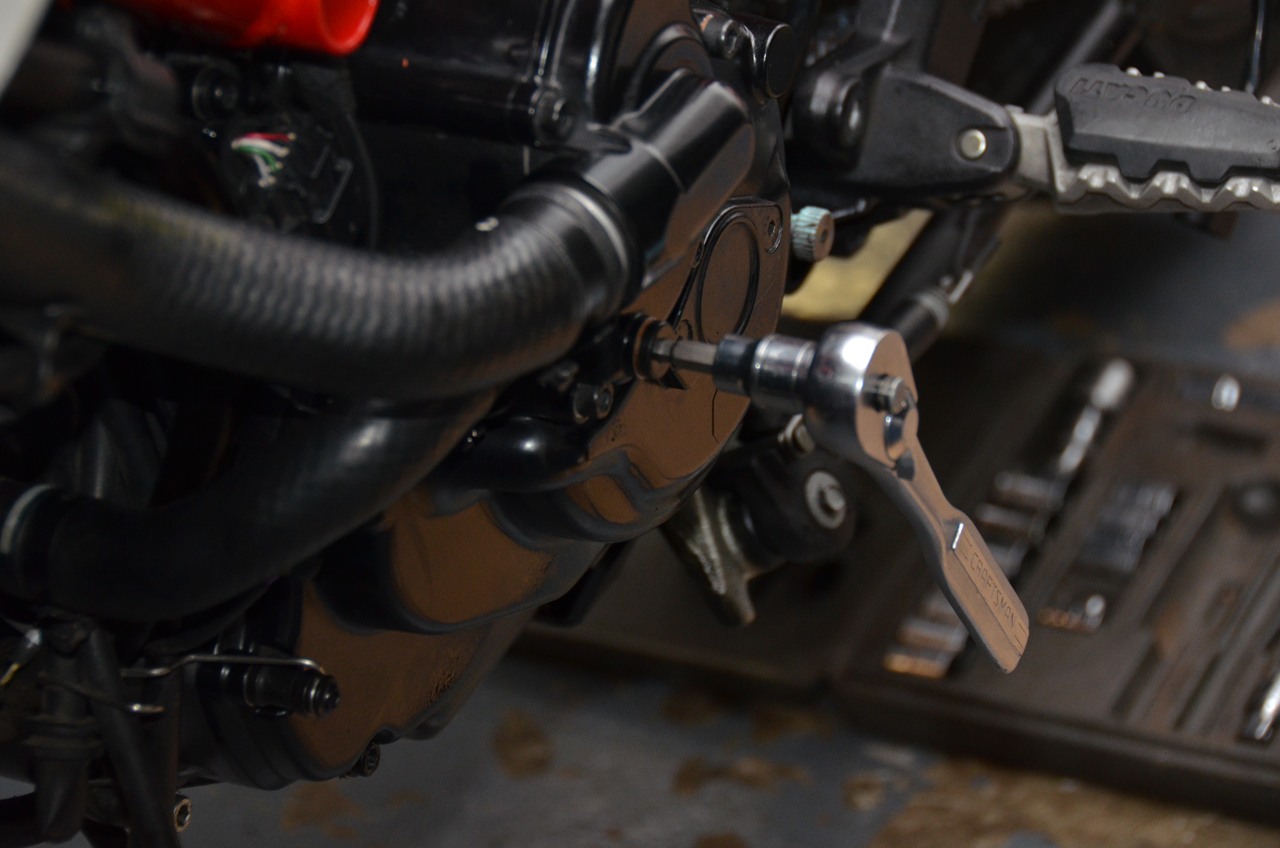
3. Remove the coolant lines completely.
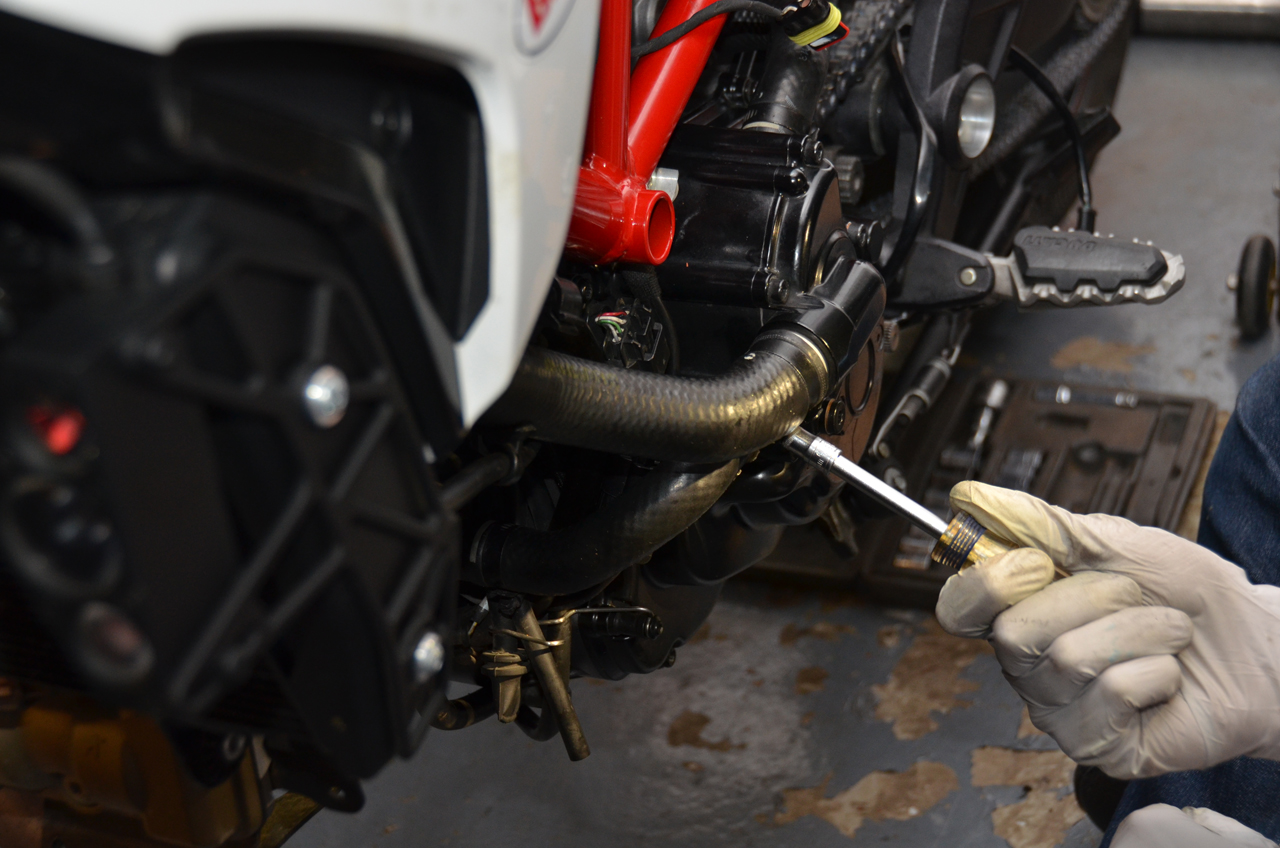
4. Remove the sidestand switch.
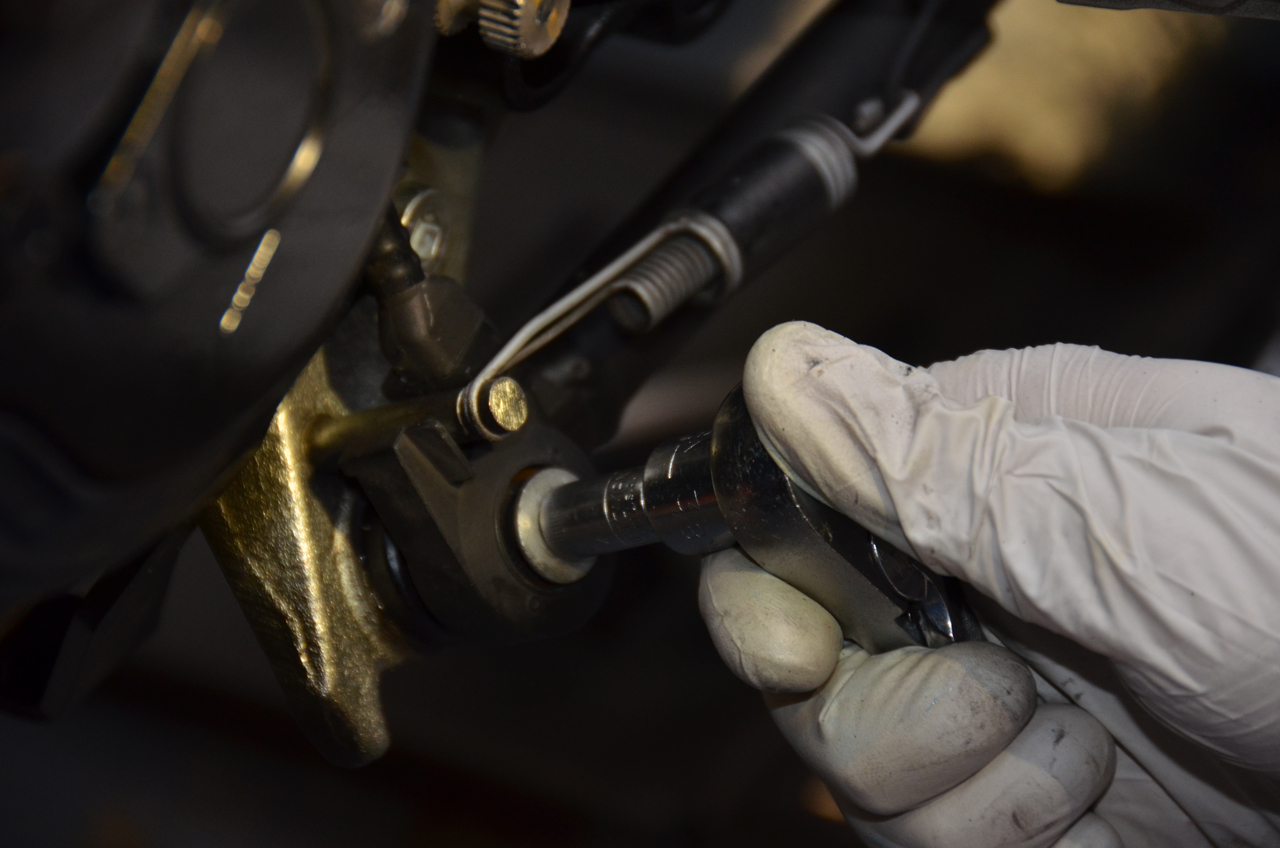
5. Mark the shift shaft location and remove the shift lever.
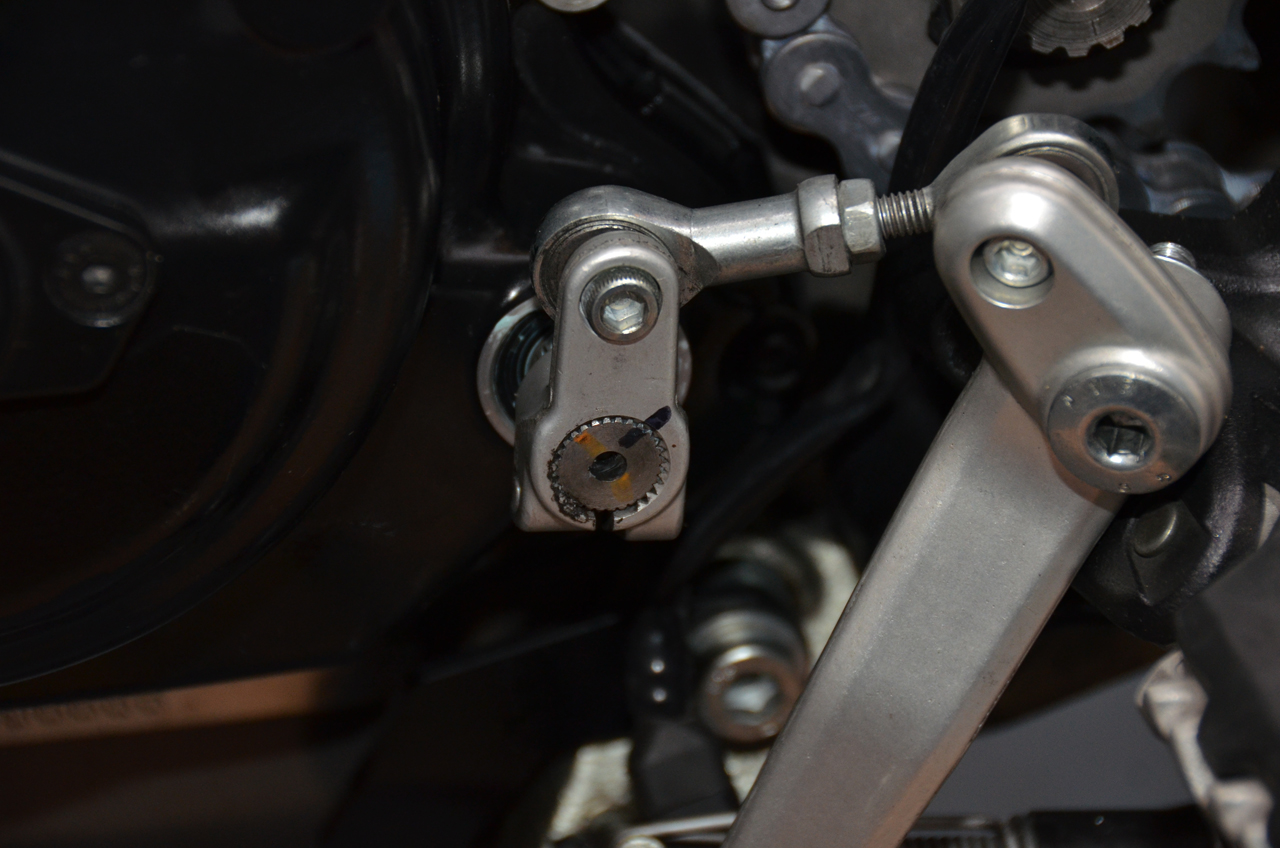
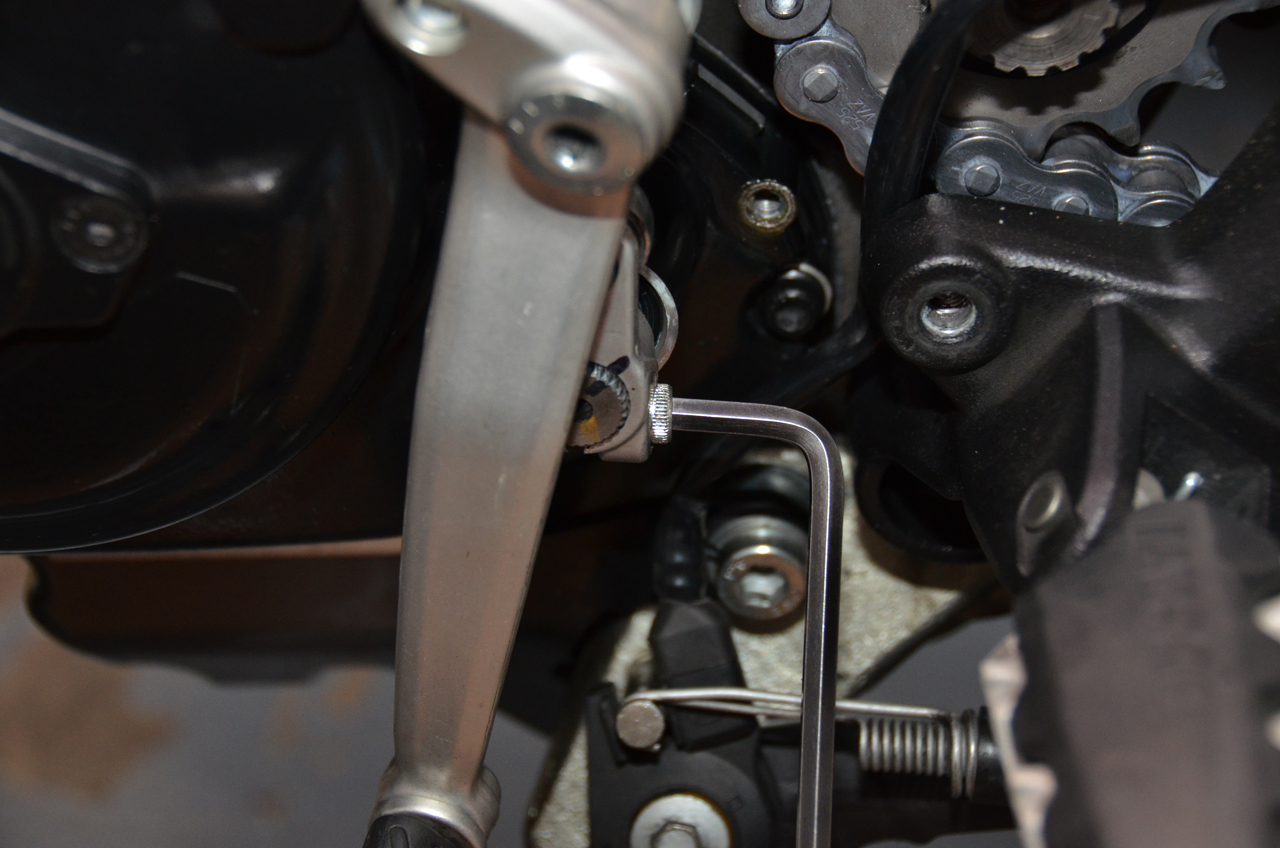
6. Remove the countershaft sprocket cover.
7. Disconnect the O2 sensor connector.
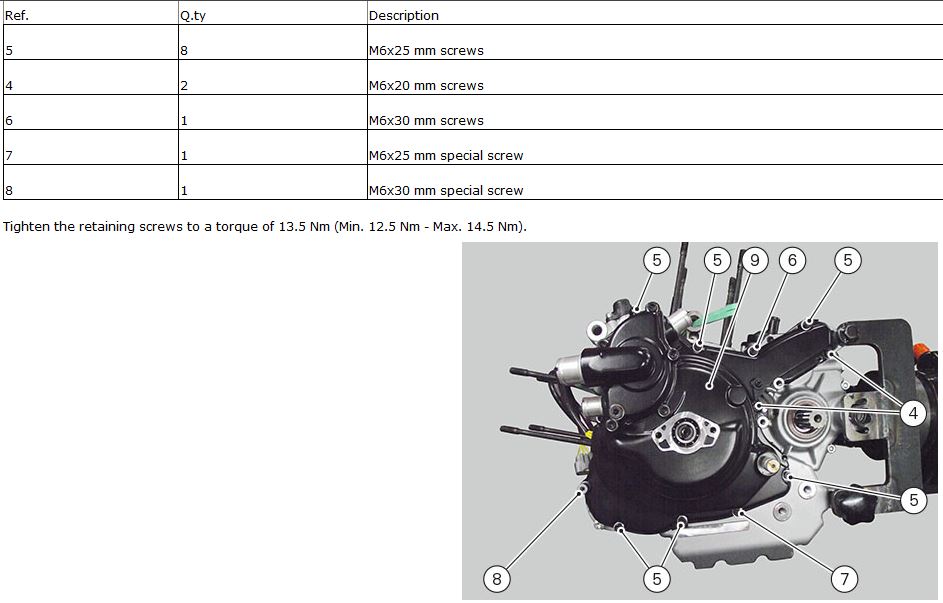
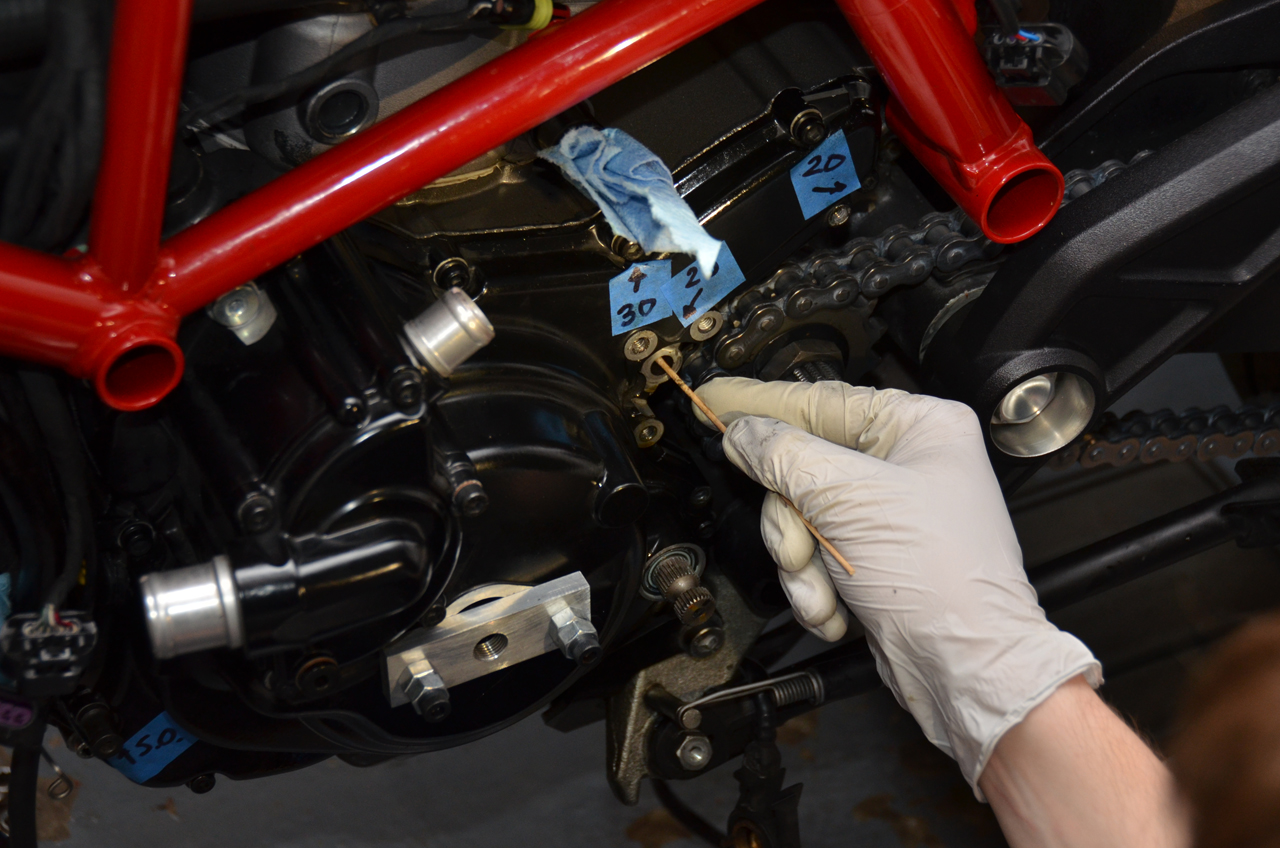
8. Remove all the bolts surrounding the generator cover. There are a few that are different lengths! Use the following guide to keep track. It also helps to mark them with tape. They are 20mm, 25mm, and 30mm in length, with one standoff looking thing. Then remove the little plastic dong thing next to the countershaft sprocket. I have no idea what it is.
9. Remove the generator cover. This is achieved by attaching a 'special' tool that pulls the cover away evenly. Here's how to make one. They're also all over eBay.
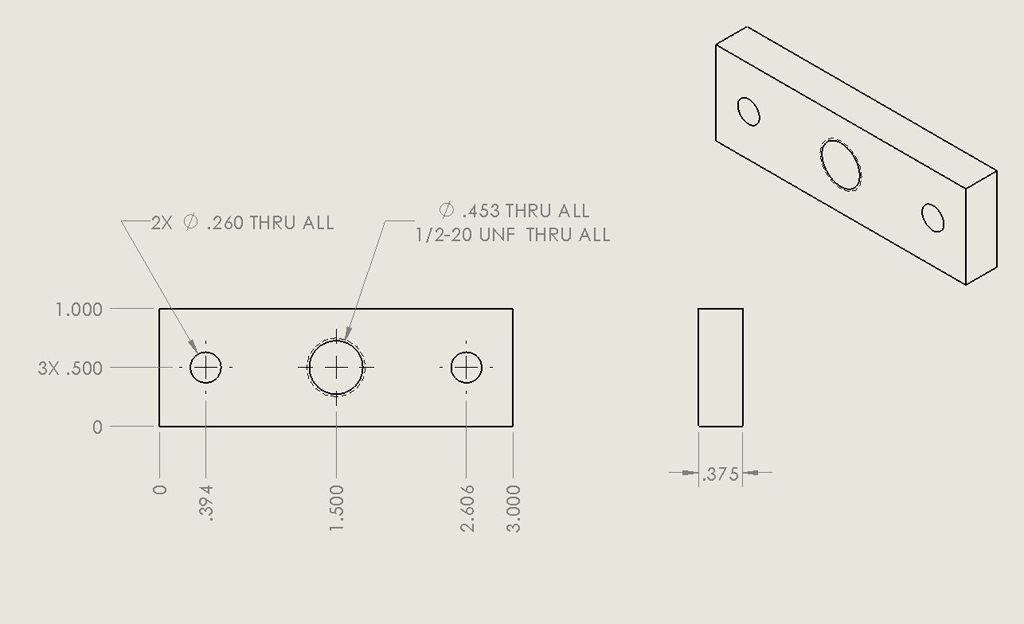
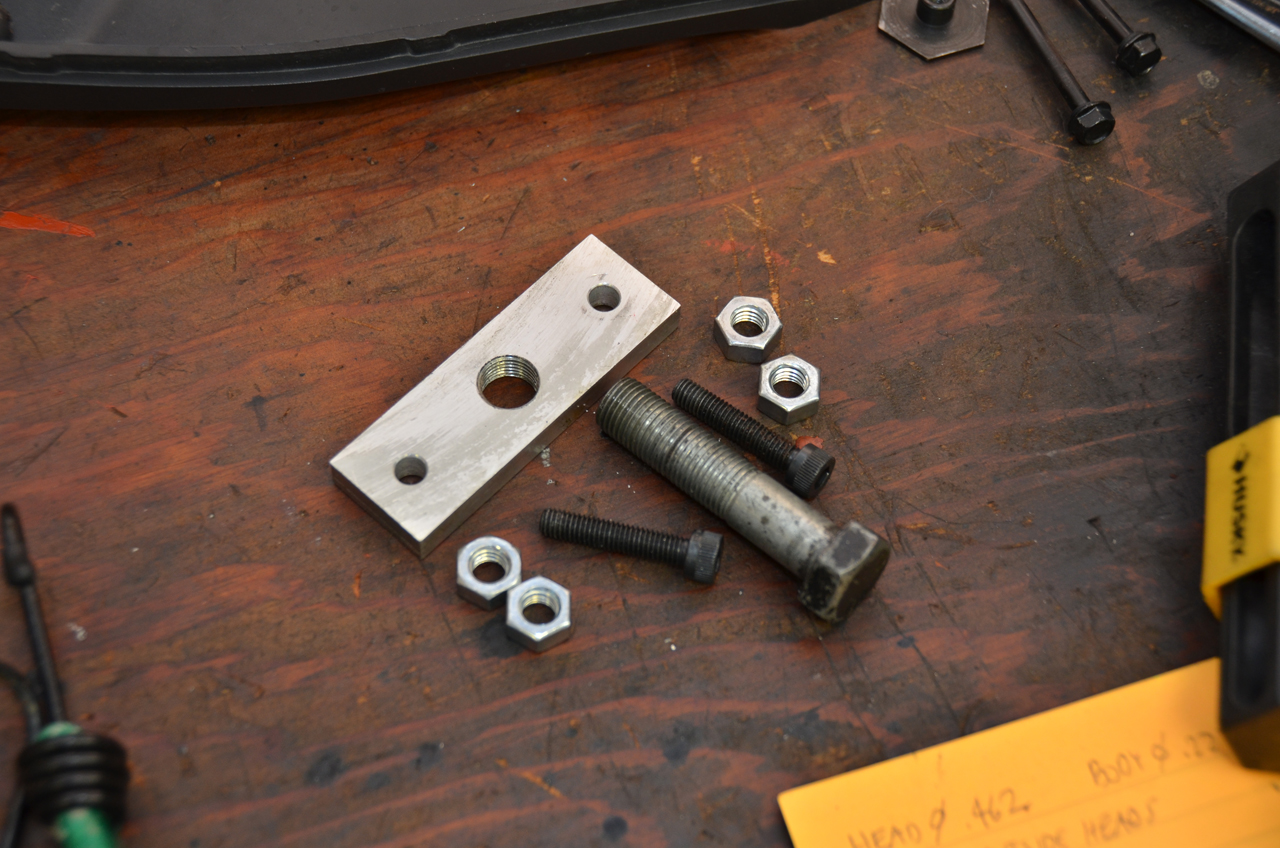
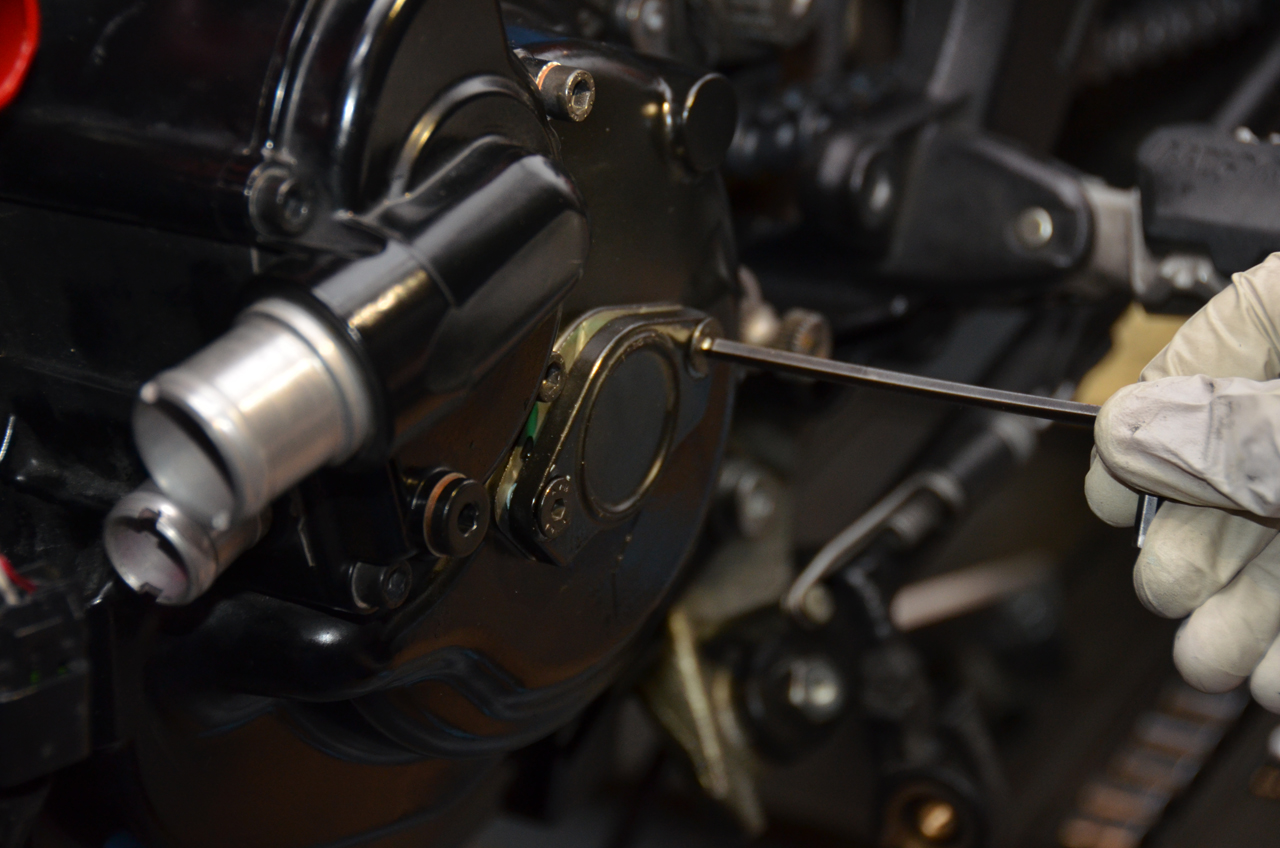
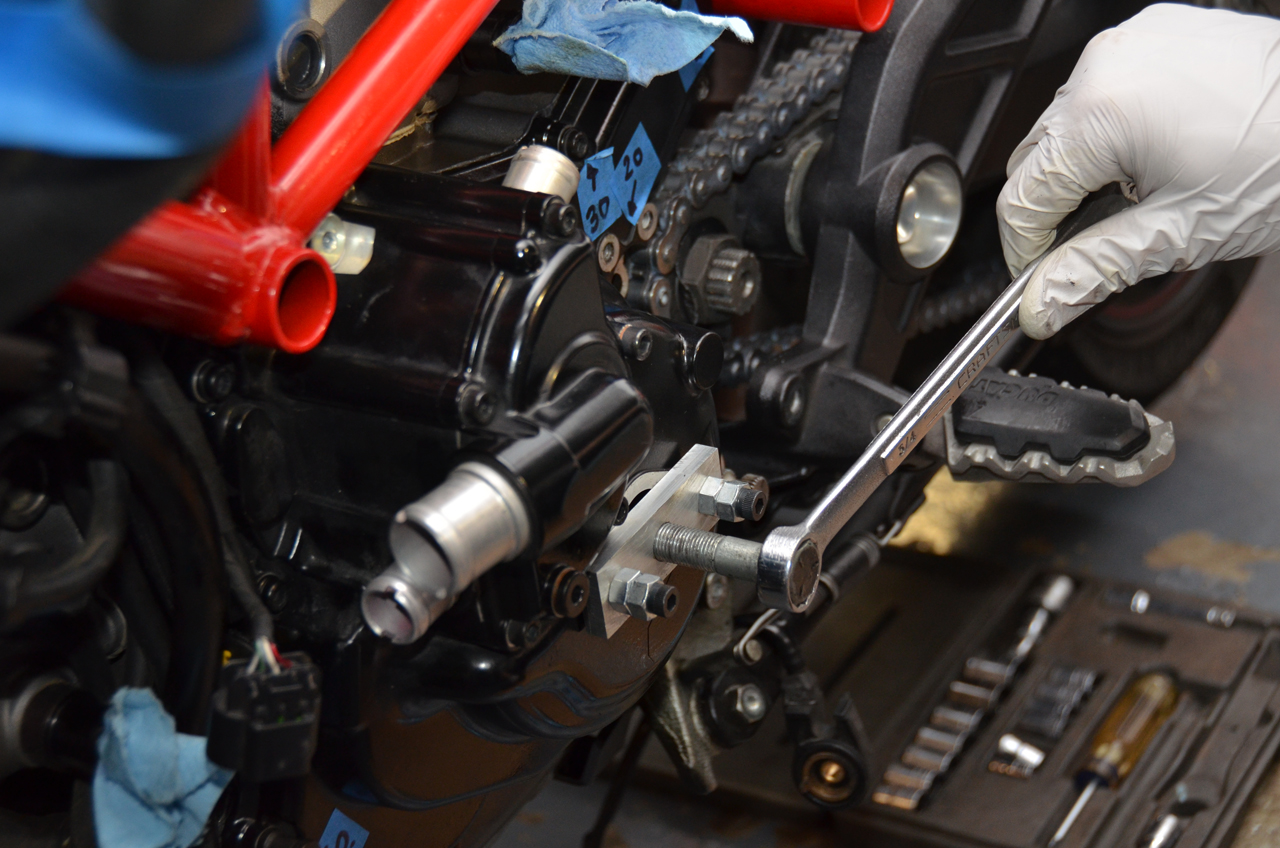
Tighten the two outside screws, then screw in the center bolt until it touches the crank. SLOWLY turn the screw, about 1/16th of a turn at a time. You will hear the seal slowly break until it pops off. Do not crack your engine cover, please.
10. Carefully pull off the generator cover and set it on a stool next to the bike. This is easier than taking off all the parts to actually disconnect the generator wires. Try not to damage the shift shaft seal.
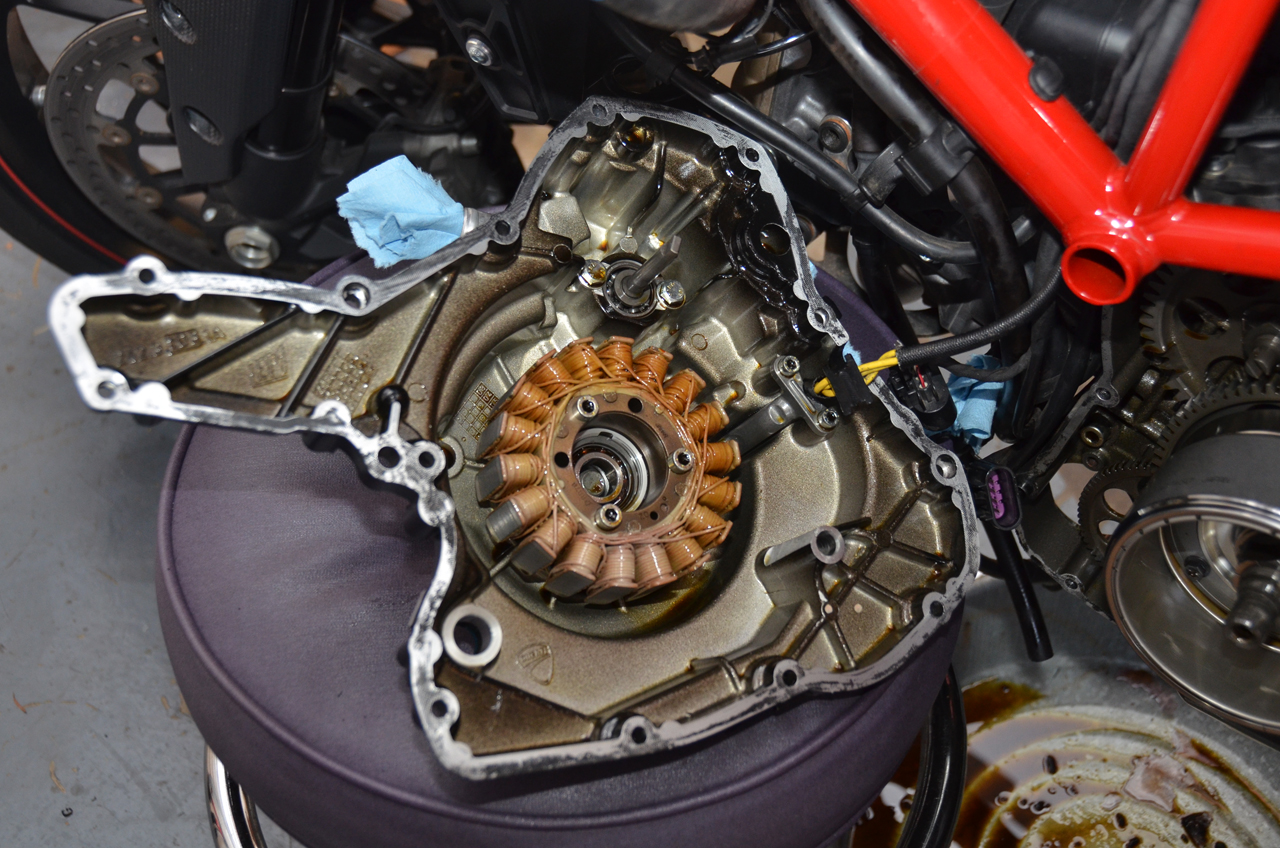
11. Take a moment to soak in the glorious engineering in front of you. Look at the gears and how shiny everything is. Ducatis are beautiful inside and out!
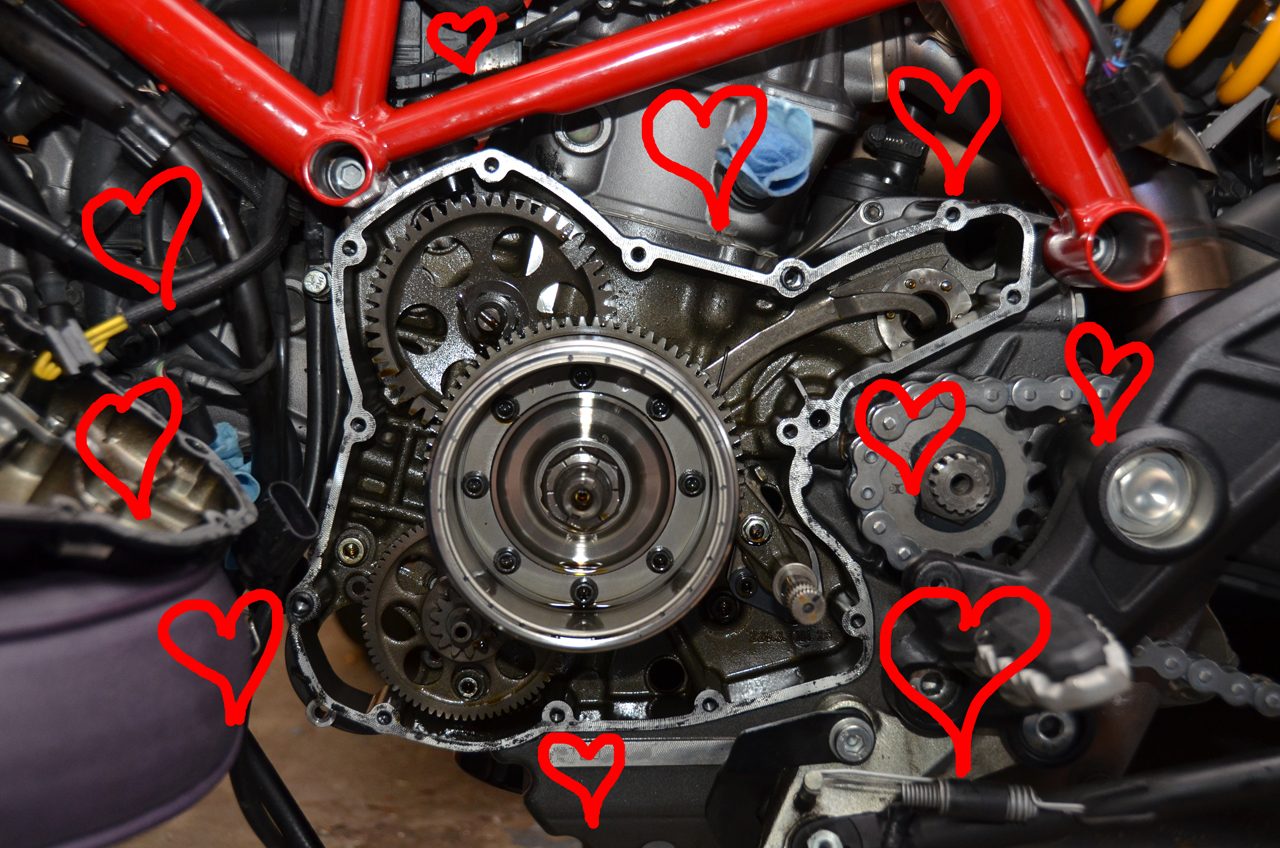
12. Now wipe that smile off your face and and start scraping the old gasket off. I found that CAREFULLY dragging a razor blade would scrape the old silicone right off. Do not scrape any metal off. Wipe off all oil residue and wipe the sealing surface with some alcohol. Might as well grease the shift shaft seal now too.
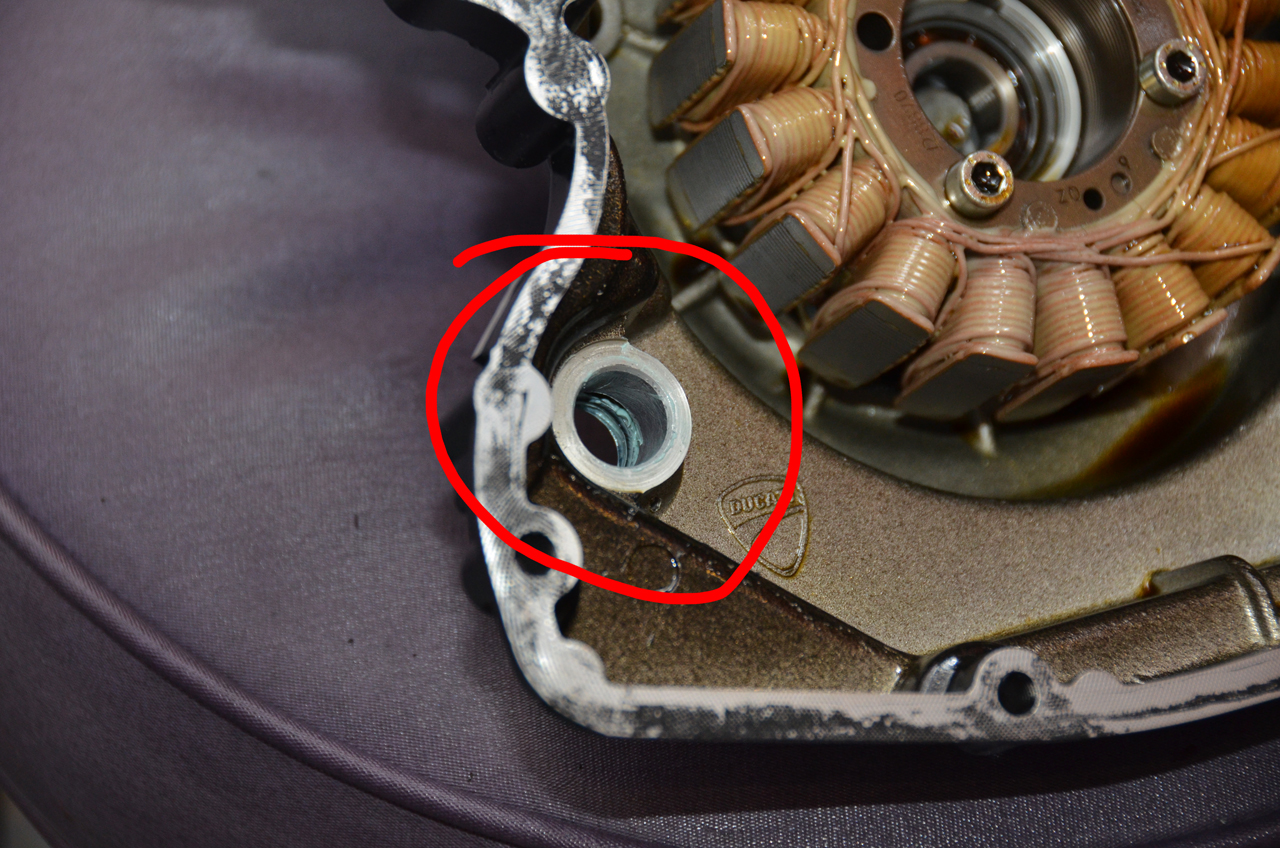
13. Disconnect the starter cable and remove the bushing bolt at the tail end of it. Then, rotate the starter gear counter clockwise with your finger until you can access the third starter motor bolt. Remove all 3 bolts, rotate the starter motor, and pull it out.
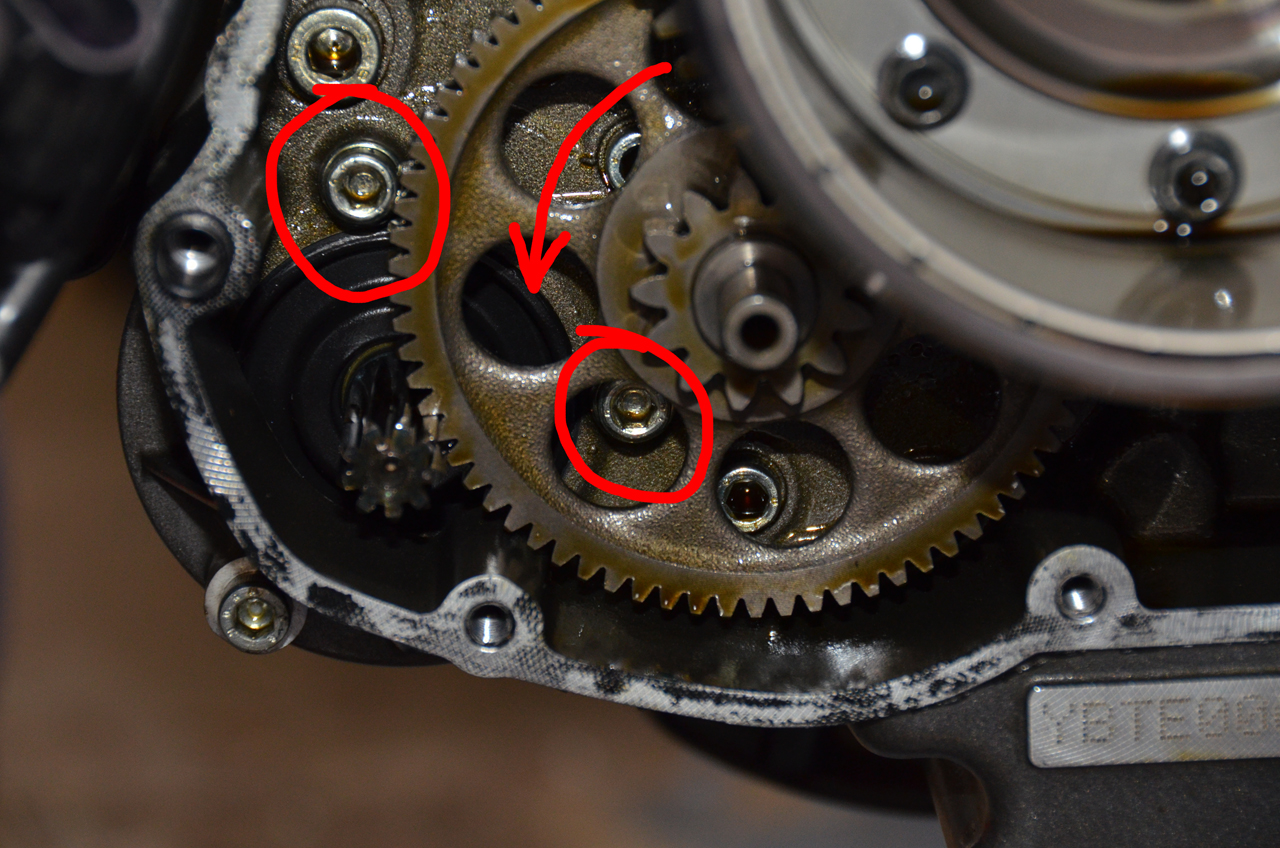
14. Behold, the inferior motor. Okay moving on. We're halfway done!!!
15. Line up the new gasket and install the new motor into the hole. Rotate it until the tail end bushing lines up. Apply some loctite to the screws, and torque them down. The 2 internal screws get torqued to 120 in-lb. The 1 external screw, and tail end bushing screw, get torqued to 90 in-lb. Rotate the motor by hand to ensure it spins with minimal resistance.
16. Using a pointy nozzle, create a small bead of silicone around the perimeter of the generator cover. You don't need much. About 1/16" wide is plenty. Go around all the screws and try to do this quickly, like, within 5 minutes or so. Also put some silicone around the generator wire grommet.
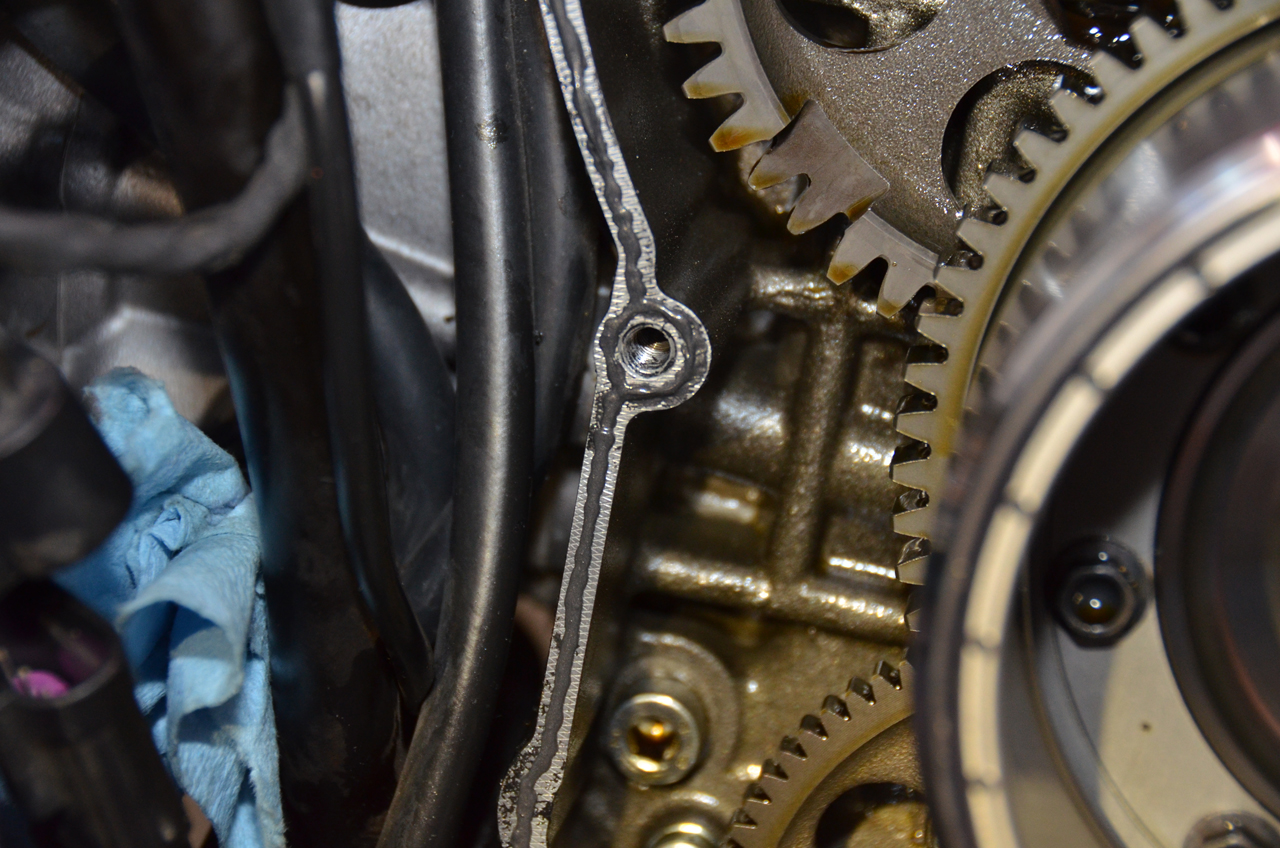
17. Carefully line up the generator cover with the shift shaft and flywheel and bring it towards the engine. You have several things to line up: The flywheel, the shift shaft, the starter gear shaft, the water pump drive shaft, the generator wire bushing, and the two alignment dowels. Good luck. It's actually very easy and should slide on quickly.
18. Carefully hand-tighten all the screws, starting from the inside and moveing outwards first left then right. Snug them incrementally, and then torque these all of these screws to 120 in-lbs.
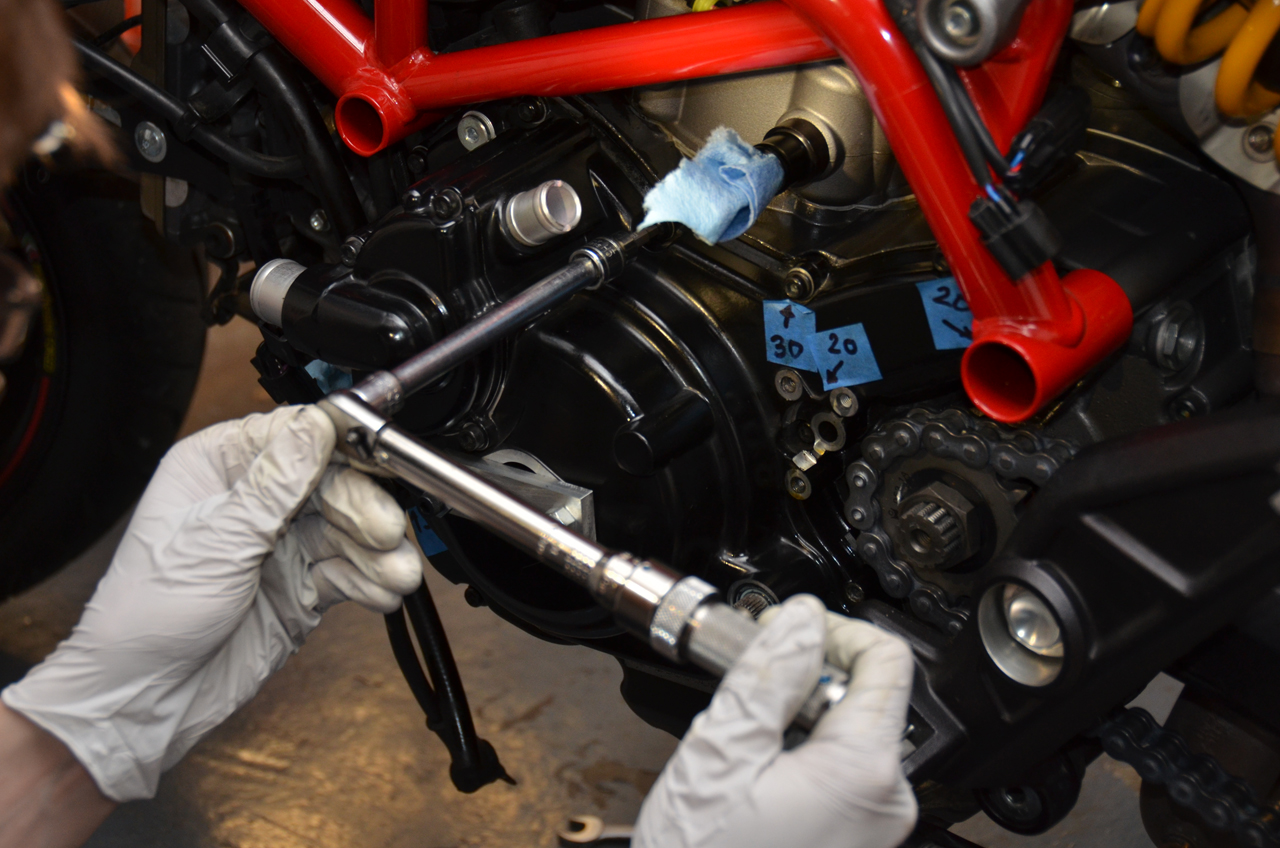
19. Clean the silicone sealant from that weird plug dong thing.
20. Follow these directions in reverse, right up until you emptied the fluids.
21. Wait 24hrs for the silicone to cure.
22. Pour the coolant back into the radiator. It helps to squeeze/pump the coolant hoses to get the air bubbles out. You should be able to get 95% of the coolant back in.
23. Refill the engine oil.
24. Start the engine. Hope and pray you did everything right. Let it warm up to operating temp, and shut it off. Top off the coolant and oil if needed.
The end.
Why?
If your starter motor sucks. This is identifiable by slow cranking with several clicks and requires 3-4 presses of the starter button, especially with the engine warm or hot. Also accompanied by a flickering dash.
Tools Required:
Misc. sockets (7mm, 8mm, 10mm)
Misc. allen keys (3mm, 4mm, 5mm, 6mm)
Torque wrench 0-20 in-lbs
Loctite 243 (primerless, medium strength)
Permatex Ultra Black gasket maker silicone (maximum oil resistance)
Grease for shift shaft seal
Dielectric or conductive grease for motor terminal
Don't forget to bring a towel! (Lots of them)
Razor blade or sharp plastic scraper
Ducati generator cover puller tool (directions below)

Parts required:
Starter motor 27040104A
Starter motor gasket 78845102A
Engine oil if you aren't reusing (commence oil discussion)
Coolant if you aren't reusing (AGIP Coolant Permanent Special)
0. Put on some good tunes and put the bike on a stand. You're gonna be here for a while. It took me a good 6 hours, most of which was cleaning the old gasket material.
1. Drain the engine oil.
2. Remove the right side fairing pieces.

Remove the three screws and lift this piece straight upwards to remove it from the slot.


Remove the two screws in the fairing and slide it towards the rear of the bike to remove it from the slots.

2. Remove the radiator cap. Drain the coolant into a clean container (old water or milk jug).The bike holds 2.3L.

Removing the radiator cap lets coolant flow out more easily. The coolant will squirt out, so make sure you are ready!

3. Remove the coolant lines completely.

4. Remove the sidestand switch.

5. Mark the shift shaft location and remove the shift lever.


6. Remove the countershaft sprocket cover.
7. Disconnect the O2 sensor connector.
8. Remove all the bolts surrounding the generator cover. There are a few that are different lengths! Use the following guide to keep track. It also helps to mark them with tape. They are 20mm, 25mm, and 30mm in length, with one standoff looking thing. Then remove the little plastic dong thing next to the countershaft sprocket. I have no idea what it is.

9. Remove the generator cover. This is achieved by attaching a 'special' tool that pulls the cover away evenly. Here's how to make one. They're also all over eBay.


Tighten the two outside screws, then screw in the center bolt until it touches the crank. SLOWLY turn the screw, about 1/16th of a turn at a time. You will hear the seal slowly break until it pops off. Do not crack your engine cover, please.


10. Carefully pull off the generator cover and set it on a stool next to the bike. This is easier than taking off all the parts to actually disconnect the generator wires. Try not to damage the shift shaft seal.

11. Take a moment to soak in the glorious engineering in front of you. Look at the gears and how shiny everything is. Ducatis are beautiful inside and out!

12. Now wipe that smile off your face and and start scraping the old gasket off. I found that CAREFULLY dragging a razor blade would scrape the old silicone right off. Do not scrape any metal off. Wipe off all oil residue and wipe the sealing surface with some alcohol. Might as well grease the shift shaft seal now too.

13. Disconnect the starter cable and remove the bushing bolt at the tail end of it. Then, rotate the starter gear counter clockwise with your finger until you can access the third starter motor bolt. Remove all 3 bolts, rotate the starter motor, and pull it out.

14. Behold, the inferior motor. Okay moving on. We're halfway done!!!
15. Line up the new gasket and install the new motor into the hole. Rotate it until the tail end bushing lines up. Apply some loctite to the screws, and torque them down. The 2 internal screws get torqued to 120 in-lb. The 1 external screw, and tail end bushing screw, get torqued to 90 in-lb. Rotate the motor by hand to ensure it spins with minimal resistance.
16. Using a pointy nozzle, create a small bead of silicone around the perimeter of the generator cover. You don't need much. About 1/16" wide is plenty. Go around all the screws and try to do this quickly, like, within 5 minutes or so. Also put some silicone around the generator wire grommet.

17. Carefully line up the generator cover with the shift shaft and flywheel and bring it towards the engine. You have several things to line up: The flywheel, the shift shaft, the starter gear shaft, the water pump drive shaft, the generator wire bushing, and the two alignment dowels. Good luck. It's actually very easy and should slide on quickly.
18. Carefully hand-tighten all the screws, starting from the inside and moveing outwards first left then right. Snug them incrementally, and then torque these all of these screws to 120 in-lbs.

19. Clean the silicone sealant from that weird plug dong thing.

20. Follow these directions in reverse, right up until you emptied the fluids.
21. Wait 24hrs for the silicone to cure.
22. Pour the coolant back into the radiator. It helps to squeeze/pump the coolant hoses to get the air bubbles out. You should be able to get 95% of the coolant back in.
23. Refill the engine oil.
24. Start the engine. Hope and pray you did everything right. Let it warm up to operating temp, and shut it off. Top off the coolant and oil if needed.
The end.
